Showing posts with label crafts for kids. Show all posts

Thursday, December 1, 2011

Easy and Meaningful Christmas Crafts to Do With Your Children...

How in the world was I to know how many Christmas craft resources were out there on the world wide web? Of course, there was a prolific amount of the more secular crafts pertaining to Santa, snowmen, and Rudolph than there were Christ-centered crafts.


But my search parameters were clear in my mind: I need to find crafts that have a Christ-centered meaning to them (or could be adapted by the parent to have such a meaning) and they needed to be easy and not too time-consuming because, if you're like me, you probably wouldn't do them if they were.

So, starting here at my little blog, here is a quick and easy nativity craft I did with the two younger ones this past Sunday.

Easy Nativity Scene


Materials:

These templates - available in either B&W or color; if you are doing this with older children or want to drag this craft out a little longer, use the B&W so your child will have to color them; if, like me, you only have time for a quick craft, use the colored ones. Oh, and by the way, I saved these templates to my computer and then inserted them into a Word document so I could re-size them and make them smaller before printing them out.

4 large popsicle sticks (or make do with the regular-sized ones if that's all you have)

piece of colored paper for the night sky background

markers/crayons - if your child is doing the coloring

Elmer's white glue and a glue stick

Everything else is pretty self-explanatory. If your children are younger, you may want to help them cut out their shapes.


We glued on the popsicle sticks for the stable first and then mounted the characters using a glue stick.


Also, I chose not to include the wise men since they were not present on the night Christ was born (contrary to how it's usually portrayed) but rather traveled to see Him when He was approximately two years old. I find the inclusion of the three wise men in the Christmas story to be very confusing to children.

Ian thought Joseph needed more facial hair... :)

And to make this craft even more meaningful, you as the parent could retell the Christmas story and answer any questions your child(ren) may have regarding this monumental event in history.

Another great resource I am using in my Sunday School class at church is this Advent coloring book. By the way, I really like Minstry-to-Children's website. This is an awesome resource site!


These drawings are just darling, and they are made to have one picture per week of Advent to color. There is also a cover page for your child to color so with my girls at church, we are coloring one page each Sunday, mounting them on red construction paper, and then will bind them into a book at the end for them to take home the Sunday before Christmas.

Now, moving on to the crafts I found online...

Beaded Candy Cane Ornament

along with this link here for a story on the origin of the candy cane and how to tie it into Jesus and His life.


An easy cut and paste evergreen tree that displays the true message of Christmas


Handmade cards - a great idea to teach children the importance of taking time to create from the heart for those they love.


Handy Coasters - great gift to the grandparents!


Helping Hand Wreath


Spool Doll Nativity


Bethlehem Backdrop

to use with ...


Mary and Joseph


Ichthys (Jesus Fish) Ornament


Children's Chrismons Ornaments


Paper nativity (just print, cut, fold, and tape)


Christmas message stars
(contains instructions for an easy or a harder star depending on child's age)


Yarn Holiday Cross


Christmas Cube Ornament


Baby Jesus Ornament


Mosaic Candles
(Shine the light of Christ!)


Simple (but so cute) clothespin nativity


Another variation of the candy cane craft
(Again use the link provided in the first candy cane craft to tie this secular symbol in with a Christ-centered theme.)


Rejoicing Angels Watercolor Painting


True Meaning of Christmas Ornaments


Okay, and I know that the following craft is much more time-consuming than all the rest, but when I saw this craft, my heart just melted. Adorable. I think it could become a family heirloom.


Wooden Block Nativity

I hope you enjoy making memories with your kids! Just remember, don't overwhelm yourself trying to do a bunch of these. Just pick one or two that you think your children would like and go with it.

Have a blessed day!

Tuesday, February 8, 2011

Integrating Art Into Your Child's Life

Brad and I both painted up through our college years. He created in mostly oils and acrylics, while I dabbled in a bit of everything but found most satisfaction in watercolors. I suppose that because of our interest in art, creativity flows somewhat naturally in our home. However, I would certainly say that it is something that has to be encouraged, especially in the early stages of integrating art into your child's life.


When I look at the world around me, it is very evident to me just how creative the Creator was/is. And since we are made in His image, we have inherited those creative "genes."

Now it is probably true that the degree of artistic talent varies from person to person, but I also believe that it is the responsibility of us as parents to expose our children to opportunities that encourage artistic expression. It is going to be very difficult to discover what areas your child is talented in if you don't provide the opportunities for your child to try various activities. This applies to any talent, not just art.


Integrating art into your child's life does not have to be a monumental, difficult task. It just takes a little thinking ahead of time, and a little encouragment in the beginning, and soon you will find your children jumping at the chance to create something.


Here are some things that I have done here at our home to encourage creativity in our children:

* Keep a variety of art supplies readily available to your children. I posted before about our armoire in the living room. The bottom half of that armoire houses all kinds of art supplies ~ paper, tablets, paints, markers, crayons, stickers, chalk, glue, stamps, etc. I used to keep these things up high, but now that my children are a little older, it's down low where they can access it at anytime during the waking day.


* Shop your local thrift stores for fun items that could be used in crafting. I've purchased a number of embroidery hoops, buttons, stamps, fabric scraps, yarn, knitting needles, sewing patterns, art books, and more from our local thrift stores. Also look at items that aren't necessarily art items like baskets, wool jackets that can be washed and turned into felted wool for sewing projects, and wooden items that could be painted and personalized.


* Shop the back-to-school sales each fall. I stock up in a major way every August when WalMart has their sale going on. This is the time to buy markers, crayons, colored pencils, glue, tablets, etc. And I always buy the Crayola brand because they are a better quality, and, on sale, are usually only 10 or 15 cents more than the off-brand.


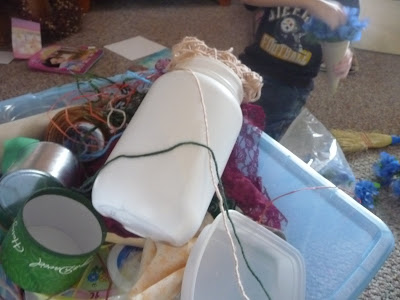
* We have a "this and that" bin that basically is just that ~ a bin of odds and ends that I've collected over the months. Things such as washed out food containers, old yarn, pieces of felt and foam, old pill containers, old silk flowers, unusual items I've found at the thrift store, etc., find their way into this bin. Then the kids can pull this bin out and create whatever their hearts desire. This really inspires creativity!


* Painting and home improvement stores will dispose of their old wallpaper sample books when the paper becomes outdated. Call your nearest store and see if you can purchase one that they are about to toss out. You may even get it free like I did! Once you have your book, lay it out on the table with scissors and glue for everyone, and tell your kids that they have to make a picture using nothing but the paper and glue. And then join them. It's lots of fun!


* Borrow art books from the library or purchase some inexpensively from half.com if your budget permits. Then study the paintings with your children, and ask your children what they think the painting shows, what the artist is trying to express, how the painting makes them feel. Some of these books even have discussion questions already written for the parent and child to talk about. I just ordered a couple of these kinds of books off of half.com to include in our art curriculum next year.


* Display your children's works of art. I couldn't possibly keep every picture my kids produce - I would be drowning in paper if I did. I bought three large magnetic clips at WalMart, one for each child. Each child gets to display one picture on the fridge at a time. Then the child gets to pick their favorite pictures, sign and date them, and they get moved to bins I keep in my closet. I read about one mom who took photos of each of her children's art works and then made a photo book of all of them at the end of each year. I thought that this was an awesome idea and one that I have wanted to implement but haven't yet.


(Crayon sketch by Lily)


(Colored pencil sketch by Ian)


(Watercolor painting by Sergei)

* Play some classical music in the background while your children are creating. I find that soft classical music calms my children and really gets the creativity flowing.


* And my last tip ~ limit your children's exposure to television and computer. Although both of these technologies can serve very good purposes, many children today receive all or most of their mental stimulation (outside of school) solely from the t.v. or computer. T.V. may keep your child entertained and out of your hair, but it does very little for their creativity and mental growth. The television begins to think for your child, and I see nothing positive in that.


Blessings to your home, and may you have many memorable art-filled moments!

Thursday, November 13, 2008

Gobble, Gobble

Today we made a turkey Thanksgiving craft. I love this craft because you use tracings of your child's hand to construct it. I always keep the crafts that use tracings of my kiddos hands. I mark the back of the craft with the date and their age, and then I'll always see how big (or little) their hands were at that particular age.

These are the supplies that you need (that's foam, not construction paper):


First you need to cut out a triangle for the beak, a tear drop for the gobbler, and two long rectangles for the legs.


Also cut out two of the following shapes. I don't really know what to call this shape, so just copy what I did. Make the yellow one slightly bigger than the orange one.


Trace your child's hand onto one piece of foam. Then stack the other two pieces of foam behind the one that is traced on and cut out the hand shape.
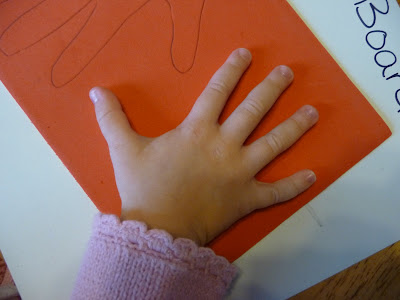


Now you have all the pieces cut out.

Start by layering two hands on top of one another, staggering the fingers so that the "tail feathers" are spread out. Then put the third hand in the middle on top of the other two.


Now, this is where I forgot and stopped taking pictures.

Take the yellow body and glue it on top of the top hand. Then glue the smaller orange body on top of the yellow one.

Then give your child the google eyes, beak, and gobbler and let them glue those into place on the turkey's body.


Last, glue the legs to the back of the craft. I had to do this part, because the glue was still wet which made it difficult to handle.

This is what it should look like when you're done:


You can glue on a magnet to the back if you'd like.
Oh, and because I think one should give credit where credit is due, I found this idea at No Time for Flashcards. You HAVE to check out this blog if you have young ones. It's filled to overflowing with TONS of ideas.

We also finished up this craft by reading this book:


Oh, and remember the Knit Your Bit program I posted about here? Well, I bought my yarn today. Enough to make at least two scarves. I'll be starting this very soon so I can get them packaged and sent off into the mail to the WWII museum in Louisiana.

Here's what I chose: 2 skeins of Spring Moss, 2 skeins of Dark Denim, and 1 skein of wheat. I will be using this pattern supplied by the WWII museum. I bought Simply Soft Eco yarn by Caron. It's supposed to be environmentally friendly. This was the first time I had ever seen it. But let me say that this yarn is very soft, and I think it would feel great wrapped around anyone's neck.

You can check out the WWII website for information on how to participate in this wonderful service project.