We started with a few of these. Decaf, of course. Not for the caffeine, but for the warmth on that 50-some degree August morning. Brrr....
Even the youngest got her cup of hot tea... (Looking pretty rough here. It was nice and early in the morning that we rose out of bed that day. Much work calls for early rising.)
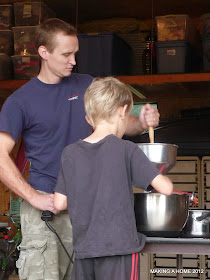
Setting up for the grinding and juicing. This is a family affair.
Ian told me that sauce day(s) was one of his favorite days of the year (behind his birthday, Christmas, and Thanksgiving.) {Big Smile}

The chickens were quite happy. There were lots of tomato scraps when we were finished.
Clean and sparkly, ready for the filling...
Pretty red rows of sauce, whole tomatoes, and salsa are lining the shelves of the can cellar, along with green rows of pickles and relishes, and purple rows of jam. It's a rainbow that makes me smile every time I walk in that tiny room. Food for the family produced through the hard work and determination of our own hands. Priceless.
Our Family Recipe:
*1/2 bushel tomatoes (put through the sieve so you have just the juice)
*1 1/2 pounds onions
*2 large green peppers
*1/2 large can of tomato paste (I'm talking the really big cans)
*fresh oregano and basil to taste (or you can use dried; we just always have and use fresh)
*4 large cloves garlic
*1/4 cup salt
*1 cup sugar
*1 pt olive oil (or canola)
This recipe makes 1 large roaster full of sauce which usually fills 14-17 quarts, depending on how far you let it cook down.
1. Put your juiced tomatoes into roaster and cook at 375 degrees until it cooks down a bit so you can add the other ingredients. (This usually takes a couple of hours.) Do be sure to stir the sauce every 1/2 hour or so while it is cooking down.
2. In the meantime, liquify the onions, garlic, and green peppers in a blender or food processor.
3. Once your juice has cooked down a bit, add all of the remaining ingredients and stir well so everything is mixed.
4. Cook at 350 degrees for another 2-3 hours until the sauce is thickened to the consistency of your liking. I usually let mine cook down until it's about 1 1/2 inches from the top of the roaster. (When you start, the liquid will be to the tip top of the roaster.)
5. Once it's the consistency you like, can into quart sized jars. And if you go to the very bottom of this post, I wrote a little bit of information on the actual canning process. That post was for strawberries, but the actual canning process is the same regardless of what you're canning.
6. Once canned, let your jars sit (I always cover mine with a towel) and then smile and pat yourself on the back every time you hear that wonderful "clink" throughout the rest of the day (that sound is music to the preserver's ears!)After letting cans set for 24 hours, move them to your can cellar or pantry.
Linking up today at Raising Homemakers


The image of the rainbow in your can pantry brought a smile to my face. Oh, how yummy it will all taste this winter. Enjoy!
ReplyDeleteI am so glad I read this! I use my roaster when I am canning pinto beans, I never thought of using it for cooking down my sauce!!!
ReplyDelete